Use PowerShell to Automate Groups and Users Provisioning in SharePoint Online
* This is an outdated blog post and no longer maintained *
In a recent blog post, I illustrated how to use PowerShell to glean information from a SharePoint Online tenant. In this post, we will show how to provision site collection users and groups. Specifically, we will use a CSV file to automate adding users and groups to multiple site collections with a simple PowerShell script. This is a pretty long blog, and I considered splitting it into smaller parts. But in the end, I thought it best to have everything in one place. If you get tired, you can always stop somewhere and pick it up later!
PowerShell enables creating and provisioning security groups and users with the cmdlets New-SPOSiteGroup and Add-SPOUser. While these cmdlets are useful for limited tasks, it’s cumbersome to invoke them repeatedly to provision a large number of groups across multiple site collections. Fortunately, PowerShell has a powerful cmdlet that enables bulk provisioning in SharePoint: Import-CSV. As you will see, we can use a combination of the Import-CSV, New-SPOSiteGroup, and Add-SPOUser cmdlets to automate the process. All we need to do is create a couple of CSV files and write a PowerShell script that reads the files and provisions the groups and users. If you are an advanced PowerShell user, you probably know how to do this already. For the rest of us, this blog provides a step-by-step “cookbook” procedure.
Requirements
The following procedure assumes you have these prerequisites:
-
An enterprise-level tenant, and login credentials for an administrative user.
-
A list of users and their aliases. In the examples shown in this blog, it is assumed that the alias has the form FirstNameLastInitial, for example John Smith’s alias would be JohnS. Of course, you can modify the CSV files to insert any aliases you wish.
-
A set of site collections to which you want to add new users and groups. It is assumed that your site collections have URLs similar to https://<tenant>.sharepoint.com/sites/<sitecollection> where <tenant> is the tenant name and <sitecollection> is the site collection name. For example, a sales site collection URL in MyTenant would be . If your tenants and site collections have different naming conventions, the CSV file can easily be customized.
-
The following software (installed in order):
-
.NET Framework 4.0; see http://www.microsoft.com/en-us/download/details.aspx?id=17851
-
PowerShell 3.0 (part of Windows Management Framework 3.0); see http://www.microsoft.com/en-us/download/details.aspx?id=34595
-
SharePoint Online Management Shell; see http://www.microsoft.com/en-us/download/details.aspx?id=30359
Prior to downloading and installing the prerequisites, check your local machine or VM to see whether SharePoint Online Management Shell already exists (it will be listed in the Control Panel > Programs and Features). If it is there, you may assume all prerequisites are installed.
Gather Needed Information
Let’s get started. First, gather some basic tenant information:
-
Tenant name – as shown above, this is the name that comes before “.sharepoint.com” in the root level URL. Here, we will show it as <tenant>.
-
Groups list – a list of security groups you wish to create, and which site collections they are assigned to. We will show some generic examples.
-
Permissions list – for each security group, the permission level(s) you wish to assign. Note: not all site collection templates share the same set of permission levels by default, so select them carefully. For reference, see this Microsoft link.
-
Users list – for each security group, a list of users you wish to assign to that group. You will need first and last names, and if the aliases are not of the FirstNameLastInitial format, each user’s alias will also be needed (by default, in the steps below Excel will automatically create the alias from the person’s first and last names).
Create the Groups and Permissions File
Creating the CSV files is pretty easy if we start in Excel, add data to the columns and rows, and then save the file in CSV format. As you will see, we can take advantage of Excel functions to quickly populate our fields. Follow these steps to create the Excel workbook from which you will subsequently create the CSV files.
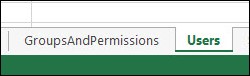
1. Open Excel and in a blank workbook, create two tabs, named GroupsAndPermissions and Users. We will start by creating the groups and permissions.
2. Save the workbook to a convenient location as SPOUsersAndGroups.xlsx.
3. In the GroupsAndPermissions tab, in cells A1:B4, enter information as shown (for <tenant>, substitute your tenant


4. In cells C1:E#, enter the column headers as shown, and the group names, site collection names, and permissions you wish to grant. # is a number that depends on how many groups you want to define. In this example, # is 9.
Note: your list will, in general, be different than the screen shot.
5. “Permissions” can be any permission level that exists on the site collection. Permission levels are defined by SharePoint Online administrators in the SharePoint Online Administration Center. To get a list of groups and available permissions, in the browser navigate to the root site of the collection, then open Site Settings and click Site Permissions. Then in the ribbon, click Permission Levels. Note that in addition to the defaults, a site collection administrator can add custom groups and permission levels.

6. Enter the heading Site in cell F1, and in cell F2, enter the following formula:
=CONCATENATE($B$4,”/sites/”,D2)
7. Enter the heading Group in cell G1, and in cell G2, enter the following formula: =C2
8. Enter the heading PermissionLevels in cell H1, and in cell H2, enter the following formula: =E2

9. You may be asking: “why create these extra columns?” Be patient, there’s a reason! Your headings and top line should look like the following (the green formatting is optional):

10. Now copy cells F2:H2 down to the end of the list. Your final F-H columns should look similar to this:
11. Open a blank Excel workbook.
12. Copy cells F1:H# from the GroupsAndPermissions tab and paste (by value) into cells A1:C#. (Remember, # is the number of data rows in your list.) Save the workbook. This is why we copied the columns; it’s easy to select adjacent columns and paste them into a CSV file.
13. If a Scripts folder does not yet exist on your local C: drive, create the folder C:\Scripts.
14. Save the Excel file to C:\Scripts as GroupsAndPermissions.csv. Accept the reminders concerning CSV files.
Create the Users File
1. Back in the SPOUsersAndGroups workbook, navigate to the Users tab.
2. As you did in the GroupsAndPermissions tab, in cells A1:B4, enter information as shown (for <tenant>, substitute your tenant name) – See Step 3.
3. In cell C1, enter Group Name, and in C2, enter one of the group names for which you want to assign a user.
4. In cell D1, enter Site Collection, and in D2, enter the following formula (for the number #, substitute the number of data rows in the GroupsAndPermissions tab): =VLOOKUP(C2,GroupsAndPermissions!$C$1:$H$#,2,FALSE)
5. In cell E1, enter First Name, and in E2, enter the first name of a user you wish to assign.
6. In cell F1, enter Last Name, and in F2, enter the last name of the user.
7. In cell G1, enter User Alias, and in G2, enter the following formula (see previous note on user aliases): =CONCATENATE(E2,LEFT(F2,1))
8. In cells C3:F#, enter the Group Name, Site Collection, First Name, and Last Name for all users that you wish to assign to groups. Note that you can assign more than one user to a group.
9. Copy cell G2 and paste into G3:G# to populate the user aliases. Your final list look similar to the following:

10. In cell H1, enter Group, and in H2, enter the following formula:
11. =C2
12. In cell I1, enter LoginName, and in I2, enter the following formula: =CONCATENATE(G2,”@”,$B$2,”.onmicrosoft.com”)
13. In cell J1, enter Site, and in J2, enter the following formula: =CONCATENATE($B$4,”/sites/”,D2)
14. Now copy cells H2:J2 down to the end of the list. The final H-J columns should look similar to this:

15. Save the updated SPOUsersAndGroups.xlsx workbook.
16. Open a blank Excel workbook.
17. Copy and paste (by value) cells H1:J# from the Users tab into cells A1:C#.
18. Save the file to C:\Scripts as Users.csv. Accept the reminders concerning CSV files.
Create and run the PowerShell script
The script is simple, consisting of just two cmdlets. First, a brief aside on how the cmdlets work. Each cmdlet reads its corresponding CSV file and treats the first row as a “header”, assigning heading names to the entries in the first row. Then it loops through successive lines, returns each line as an object, and assigns the object’s properties (for example, Group, LoginName, and Site URL) to the comma-separated values in the line. In this example, I have matched the object property and the heading name, e.g. -Group $._Group. You can use other heading names in the CSV file if you wish, as long as you match up the heading name with the property you intend to populate, for example -Group $_.OtherGroupHeadingName.
-
Open NotePad and copy the following text block into it:
Import-Csv C:\Scripts\GroupsAndPermissions.csv | where {New-SPOSiteGroup -Group $_.Group -PermissionLevels $_.PermissionLevels -Site $_.Site}
Import-Csv C:\Scripts\Users.csv | where {Add-SPOUser -Group $_.Group –LoginName $_.LoginName -Site $_.Site}
-
Save the file to C:\Scripts as UsersAndGroups.ps1.
-
Start SharePoint Online Management Shell with elevated permissions (Start > SharePoint Online Management Shell > Run as Administrator).
-
At the PowerShell prompt, type or copy/paste the following cmdlet (do not press ENTER yet). Note: in PowerShell, you can right-click and select Paste to paste from the clipboard.
Connect-SPOService -Url https://<tenant>-admin.sharepoint.com -credential <AdminUser>@<tenant>.onmicrosoft.com
-
Make the following substitutions: <tenant> is your tenant name, and <AdminUser> is the alias of a user with administrative permissions (i.e. they can access the SharePoint Online Administration Center site.
-
Press ENTER to execute the cmdlet.
-
At the login screen, enter the password for the admin user and press ENTER. You are now connected to your SharePoint Online Tenant.
-
If needed, change your directory to C:\Scripts. Your screen should look similar to the following:

9. At the PowerShell prompt, type the following line and press ENTER:
.\UsersAndGroups.ps1
10. Wait for the process to complete; it may take 3-4 minutes depending on how many groups and users you defined. The PowerShell prompt will return. If you see the dreaded “red ink”, indicating failure of one or more of the cmdlets, such errors are usually due to errors in populating the CSV file(s), mistyping the tenant name or URL, or similar details. The error messages should lead you to the problem fairly quickly.
Verify Your Results
-
Return to your browser and navigate to https://<tenant>.sharepoint.com/sites/<sitecollection> where <sitecollection> is one of the site collections to which you added groups and users.
-
Click Settings (gear icon at the upper right), and then click Site Settings.
-
Click People and Groups.
-
In the left navigation, click More…
-
Confirm that the new groups you defined in the CSV file were added.
-
Click one or more of the groups and confirm that the new users were added.
-
Close the SharePoint Online Management Shell window.
Congratulations, you’re done!
In summary, this (admittedly long) blog showed you how to automate provisioning of security groups and users in SharePoint Online, using CSV files and a simple PowerShell script. I hope it is useful to some of you. Enjoy!